
Salted caramel has become a modern classic in the dessert world, adored for its perfect balance between rich, buttery sweetness and a touch of saltiness that awakens the palate. When combined with the creamy luxury of homemade ice cream, the result is nothing short of divine. This Salted Caramel Ice Cream Recipe offers you a gourmet experience at home, without the need for an ice cream maker. Whether you’re looking for an indulgent dessert for a summer gathering or a decadent treat to enjoy year-round, this recipe is sure to satisfy your cravings.
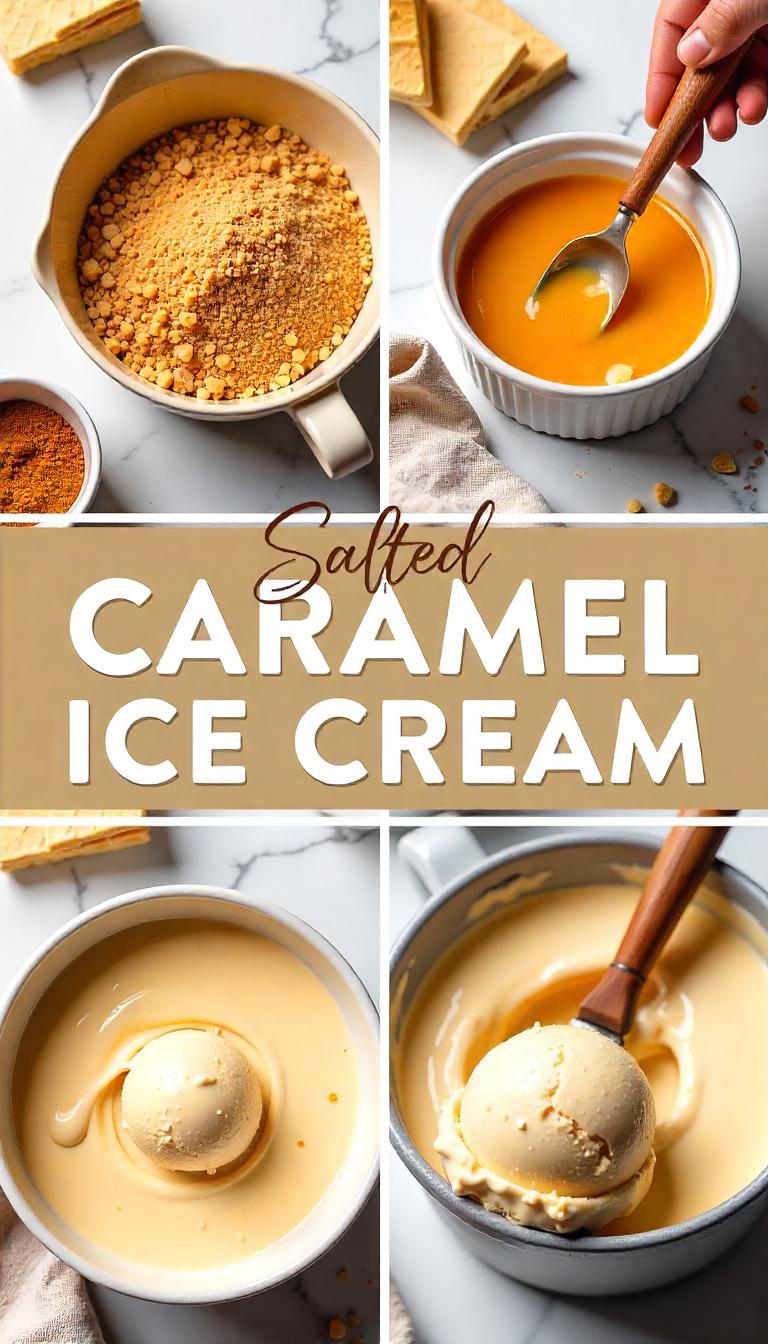
The process includes making a luscious homemade caramel sauce, which is then swirled into a rich custard base before freezing to perfection. With a smooth texture, complex flavor, and a sprinkle of sea salt that enhances every bite, this is one dessert you’ll keep coming back to.
Prep Time, Active Time, Resting Time, and Total Time
-
Prep Time: 20 minutes
-
Active Time: 30 minutes
-
Resting/Chilling Time: 6–8 hours (or overnight)
-
Total Time: 7.5 to 9 hours
Cuisines: American, French-inspired
Course: Dessert
Servings: 6–8 servings
Calories (per serving): Approx. 320–380 kcal
Nutrition (Per Serving – Approximate)
| Nutrient | Amount |
|---|---|
| Calories | 350 kcal |
| Carbohydrates | 35g |
| Sugars | 32g |
| Fat | 22g |
| Saturated Fat | 13g |
| Protein | 5g |
| Cholesterol | 145mg |
| Sodium | 180mg |
| Fiber | 0g |
Note: Nutritional values may vary based on specific ingredients and brands used.
Equipment Needed
-
Heavy-bottomed saucepan
-
Medium mixing bowls
-
Whisk
-
Fine-mesh strainer
-
Ice bath (large bowl filled with ice and water)
-
Spatula
-
Plastic wrap
-
Loaf pan or freezer-safe container
-
Optional: Ice cream maker (if using the churn method)
Ingredients
For the Caramel Sauce:
-
1 cup granulated sugar
-
6 tbsp unsalted butter, cubed
-
1/2 cup heavy cream (room temperature)
-
1/2 tsp fine sea salt (or to taste)
For the Ice Cream Base:
-
2 cups heavy cream
-
1 cup whole milk
-
4 large egg yolks
-
1/2 cup granulated sugar
-
1 tsp pure vanilla extract
-
1/4 tsp sea salt (to enhance flavor further)
-
Optional: Extra caramel for swirling (reserved from the sauce)
Instructions
Step 1: Make the Salted Caramel Sauce
-
Melt the Sugar: In a heavy-bottomed saucepan over medium heat, pour in the granulated sugar and let it melt slowly. Stir occasionally with a heat-resistant spatula or whisk to prevent burning and to distribute heat evenly. The sugar will clump at first, then gradually melt into a golden amber liquid.
-
Add Butter: Once fully melted and caramel-colored, carefully add the butter. It will bubble vigorously—stir until butter is fully melted and combined.
-
Add Cream: Slowly pour in the cream while stirring constantly. The mixture will bubble up again—keep stirring until smooth.
-
Salt It: Add the sea salt and mix well. Let the caramel simmer for another minute, then remove from heat.
-
Cool It Down: Let the caramel cool slightly, then transfer to a heat-safe bowl or jar. Reserve 1/3 cup for swirling into the ice cream later.
Step 2: Make the Custard Base
-
Heat the Cream and Milk: In a medium saucepan, combine the heavy cream and whole milk. Heat gently over medium heat until just starting to simmer, not boil.
-
Whisk the Yolks and Sugar: In a separate bowl, whisk the egg yolks and sugar until pale and creamy.
-
Temper the Eggs: Slowly pour about 1/2 cup of the hot cream mixture into the yolks while whisking continuously. This tempers the eggs so they don’t scramble.
-
Combine and Cook: Pour the tempered yolk mixture back into the saucepan with the rest of the cream. Cook over low heat, stirring constantly, until the mixture thickens slightly and coats the back of a spoon (around 170–175°F or 77–80°C).
-
Add Caramel and Vanilla: Remove from heat and stir in about 2/3 of your caramel sauce (save the rest for swirling). Mix in vanilla extract and additional sea salt to enhance flavor.
-
Strain and Chill: Strain the mixture through a fine-mesh sieve into a clean bowl to remove any curdled bits. Place this bowl over an ice bath to cool quickly, then cover with plastic wrap (pressing it against the surface to prevent a skin). Chill in the refrigerator for at least 4 hours or overnight.
Step 3: Churn or Freeze
Option A: With Ice Cream Maker
-
Pour the chilled mixture into your ice cream maker and churn according to the manufacturer’s instructions (usually 20–30 minutes).
-
Once churned to soft-serve consistency, transfer to a container. Swirl in the reserved caramel using a spoon or knife. Don’t overmix—leave ribbons of caramel visible.
-
Freeze for 4–6 hours or until firm.
Option B: No Ice Cream Maker
-
Pour the chilled custard into a loaf pan or freezer-safe container.
-
Every 30 minutes for 2–3 hours, stir vigorously with a fork or hand mixer to break up ice crystals.
-
After 3 hours, swirl in reserved caramel and let it freeze solid for another 4–6 hours.
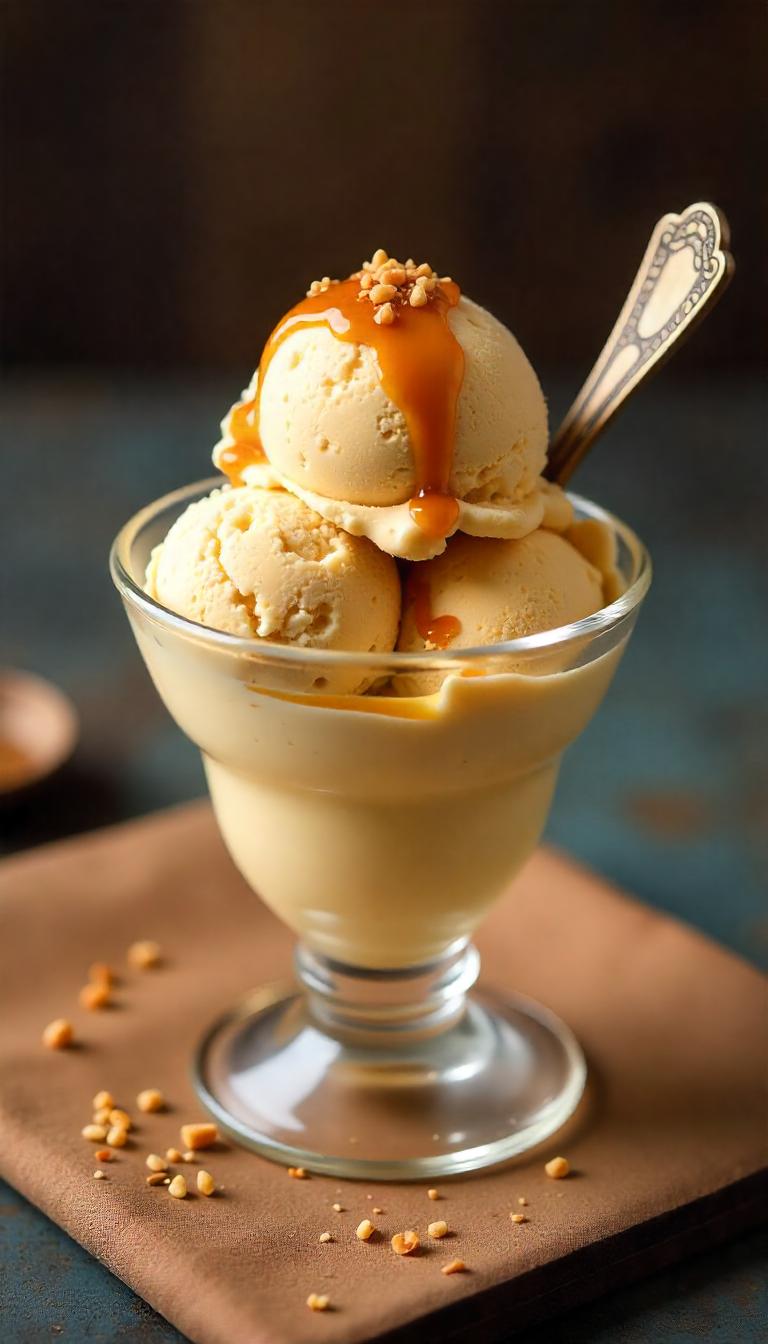
Serving Suggestions
-
Serve in bowls or waffle cones.
-
Drizzle with extra caramel and a pinch of flaky sea salt for a dramatic finish.
-
Pair with warm brownies, apple pie, or chocolate cake for a luxurious dessert.
-
Sprinkle crushed pecans or toffee bits for added crunch.
Tips & Variations
-
Make it boozy: Add a tablespoon of bourbon to the custard base for a deeper flavor.
-
Vegan version: Use full-fat coconut milk and a dairy-free caramel alternative.
-
Chocolate twist: Add dark chocolate chunks or swirl in chocolate ganache before freezing.
-
Salt level: Adjust salt to taste—fine sea salt enhances subtly, while flaky salt offers texture.
Conclusion
This Salted Caramel Ice Cream Recipe is a sensational blend of creamy indulgence and deep caramel notes, perfectly balanced with a hint of salt. It’s a showstopper that’s surprisingly achievable in your home kitchen, no matter your experience level. With minimal equipment and maximum flavor, this dessert is bound to impress anyone lucky enough to grab a spoon. Whether served in a cone, alongside a favorite cake, or enjoyed solo as a late-night treat, it promises rich satisfaction in every bite.

I am Ashley Doyle, Senior Specialist in Food & Policy at The Humane Society of the United States and editor at airfryermama.com. I am passionate about transforming our global food system by promoting delicious, climate-friendly, plant-based foods. After transitioning from law to food and public policy, I now work with major food service companies to develop plant-based initiatives and animal welfare policies. My goal is to drive institutional change to combat climate change and improve our food system.